Why is it Important to Calibrate your Load Cell? | FUTEK
Accredited Calibration.
Fast Turnaround.
System-Ready.
Trusted by engineers in the world’s most demanding industries
What We Calibrate
From single sensors to full systems, our calibrations are traceable, accurate, and audit-ready.
We offer calibration services for a wide range of sensors, including load cells, torque sensors, multi-axis sensors, pressure transducers, and complete plug-and-play systems. Whether it’s a FUTEK product or a compatible third-party device, our lab is equipped to test, validate, and document sensor performance with confidence.
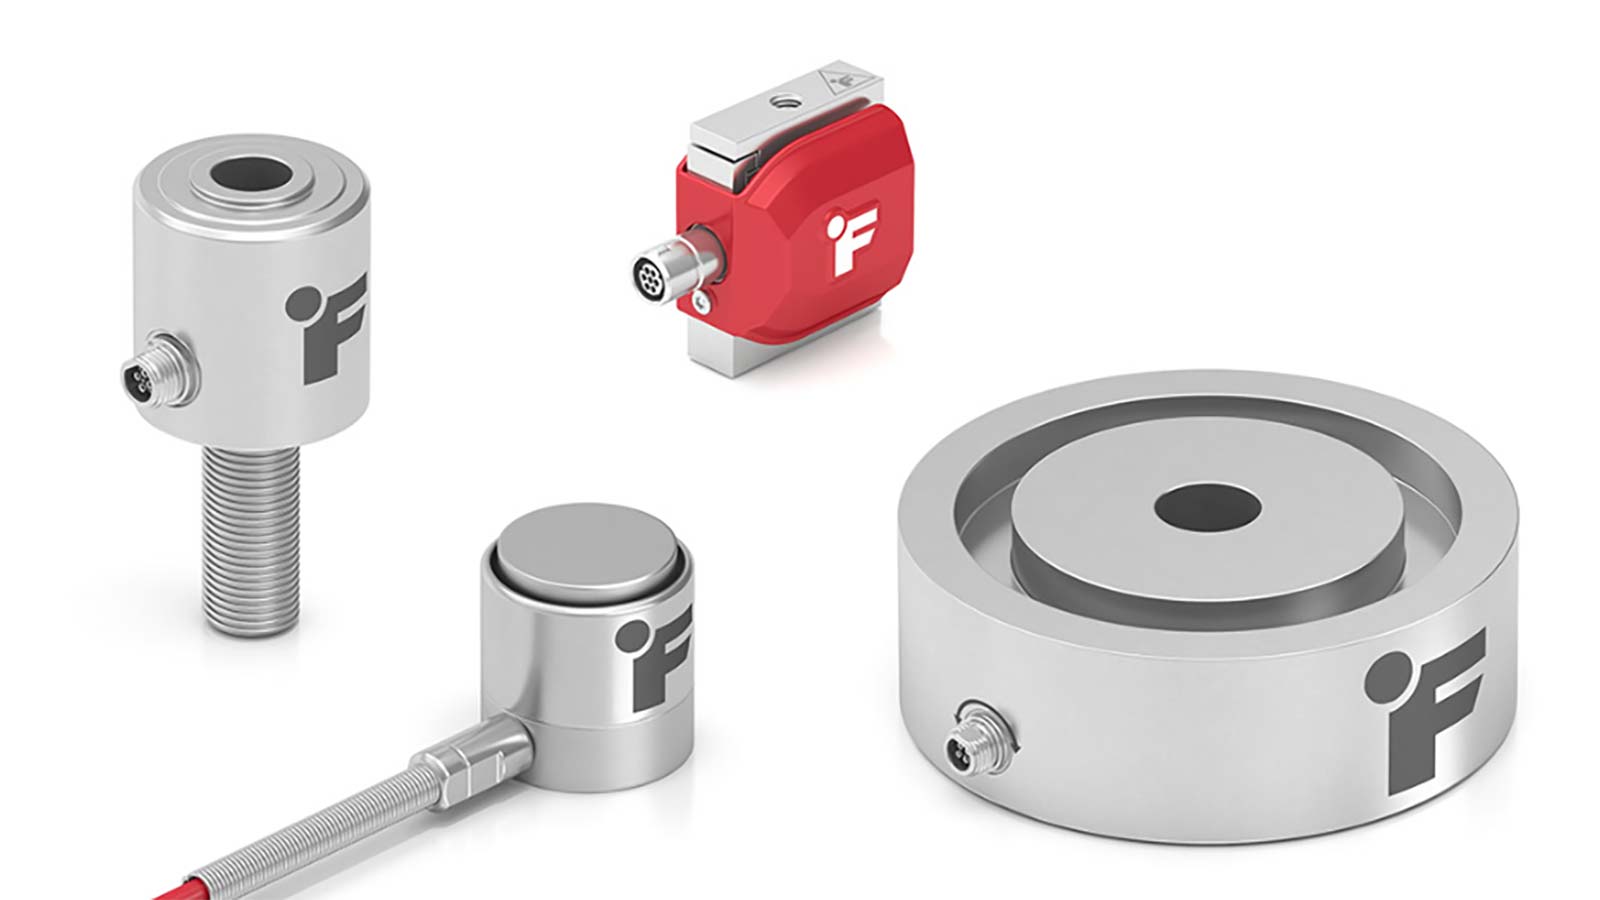
Load Cells / Force Sensors
Tension and compression calibration for in-line, S-beam, thru-hole, pancake, and other load cell types Up to 120,000 lbs.
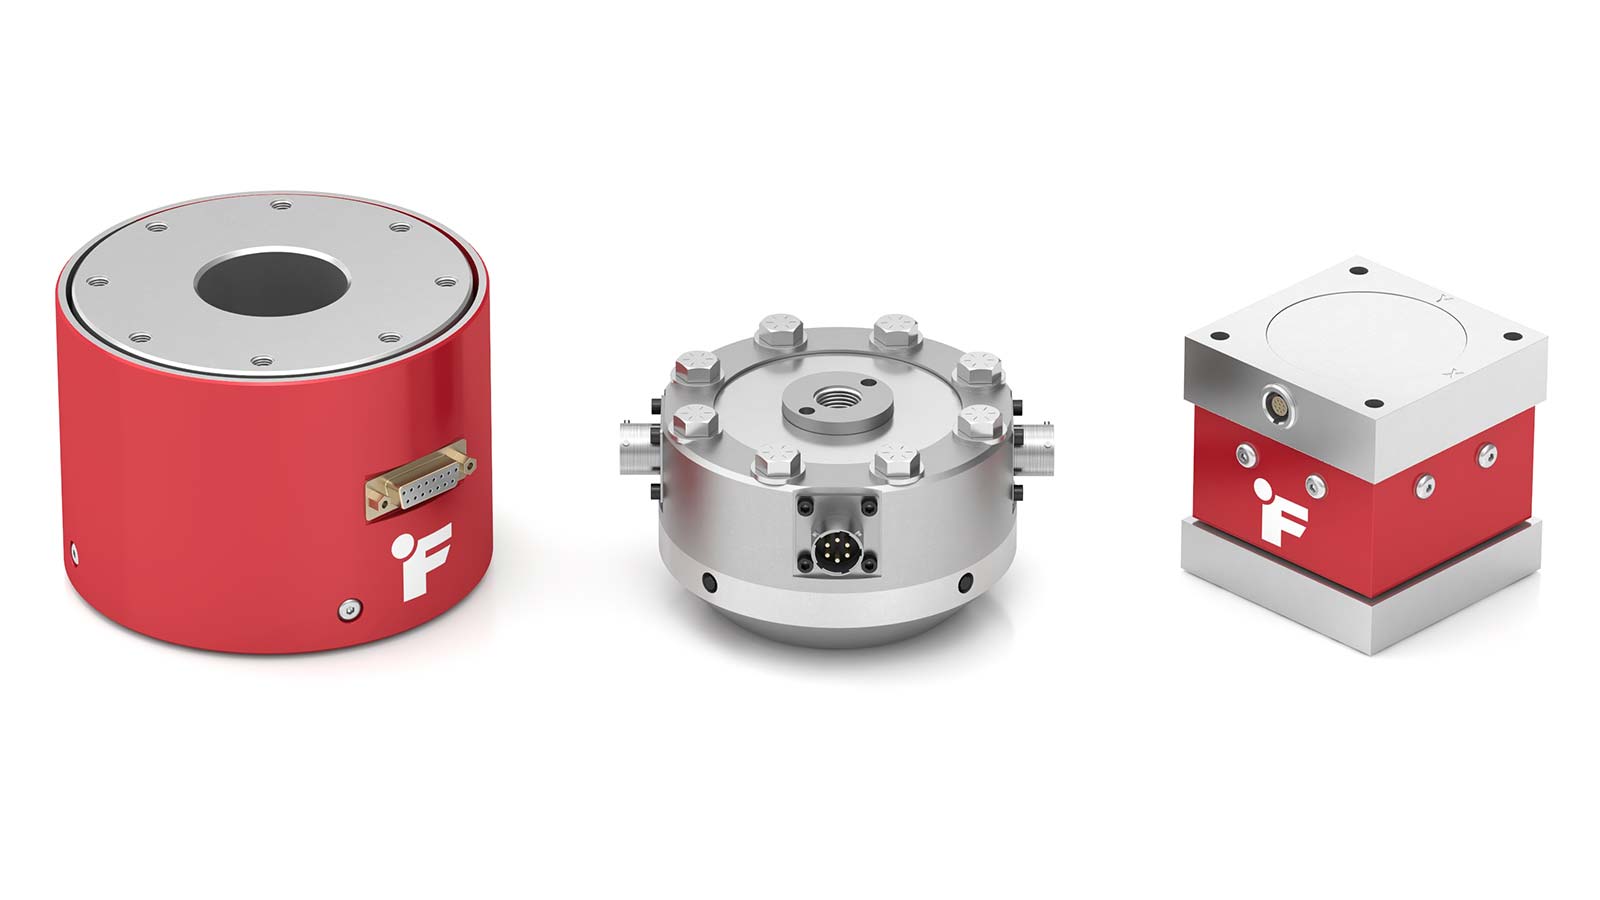
FUTEK calibrates a broad range of load cells and force sensors—including tension-only, compression-only, and bidirectional designs. Our lab supports capacities up to 120,000 lbs for force sensors and performs deadweight calibrations from 1 mg to 3,000 lbs. This includes both standard FUTEK models and compatible third-party bridge-style sensors. We also handle specialty configurations like Thru-hole, rod ends, pancake, and other geometries.
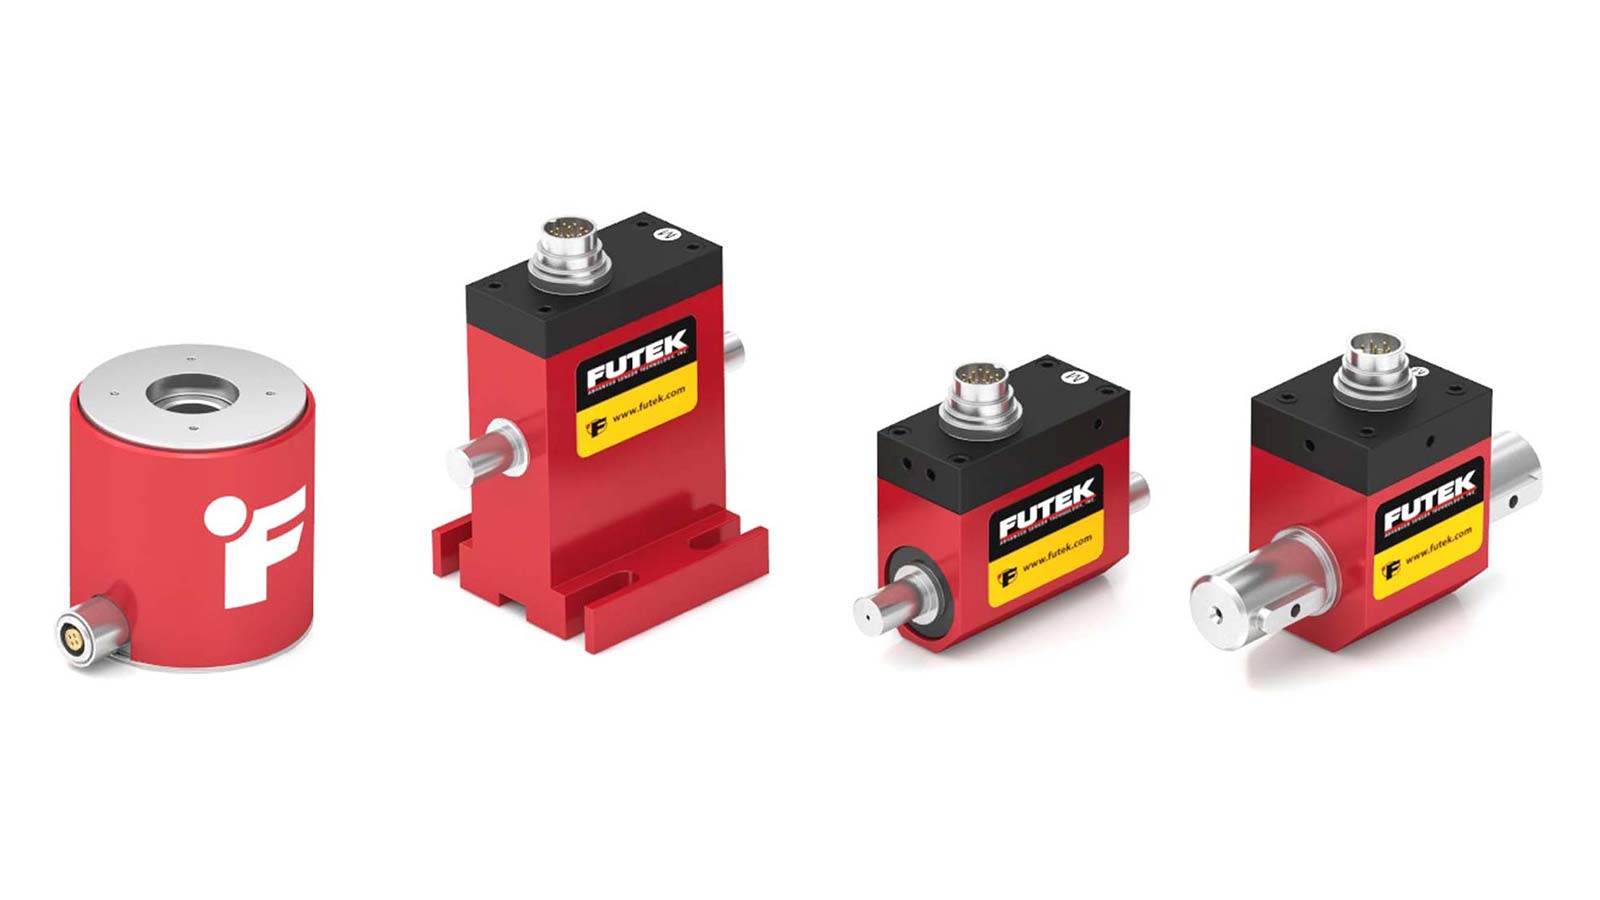
Torque Sensors
Reaction and rotary torque sensor calibration up to 24,000 in-lb @ 12,000 RPM.
We provide high-precision calibration for both rotary and reaction torque sensors, supporting capacities up to 24,000 in-lb and rotational speeds up to 12,000 RPM. Our lab handles square drive, shafted, and flange-style configurations used across automotive, aerospace, and industrial systems. With dynamic testing capabilities, we simulate real-world torques and provide comprehensive data — perfect for verifying torque-to-voltage output curves, linearity, and drift.

Complete Systems
Plug-and-play system calibration with total system error (Sensor + Cable + Instrument).
System calibration delivers more than just a certified sensor — it ensures the entire measurement chain (sensor, cable and electronics) performs as a unit. By analyzing total system error, we account for gain, offset, non-linearity, and noise introduced by connected components. The result? A plug-and-play system you can install and trust immediately — no field tuning required. This service is ideal for production environments and high-stakes testing where accuracy and repeatability are critical.
Multi-Axis Sensors
High-precision calibration for multi-axis force/torque sensors (Fx, Fy, Fz, Mx, My, Mz)
FUTEK supports calibration of multi-axis force/torque sensors measuring up to six components: three orthogonal forces (Fx, Fy, Fz) and three torques (Mx, My, Mz). Due to the complexity of this process, which includes custom fixturing, precise alignments, and specialized lab procedures, multi-axis calibration services are currently limited to FUTEK-manufactured models. Please contact our team to confirm whether your sensor falls within our calibration scope and to validate supported load and torque ranges.

Pressure Sensors
Strain gauge–based pressure transducers with bridge-style output up to 10,000 PSI.
FUTEK supports calibration for strain gauge–based pressure transducers up to 10,000 PSI. These include flush diaphragm, threaded, and industrial-style units commonly used in medical, fluid power, and test stand environments. Our process includes both zero and span verification with traceability to NIST standards. Note: Sensors requiring media, special fixtures, or high-pressure fluids may require advanced coordination.
Instruments & Signal Conditioners
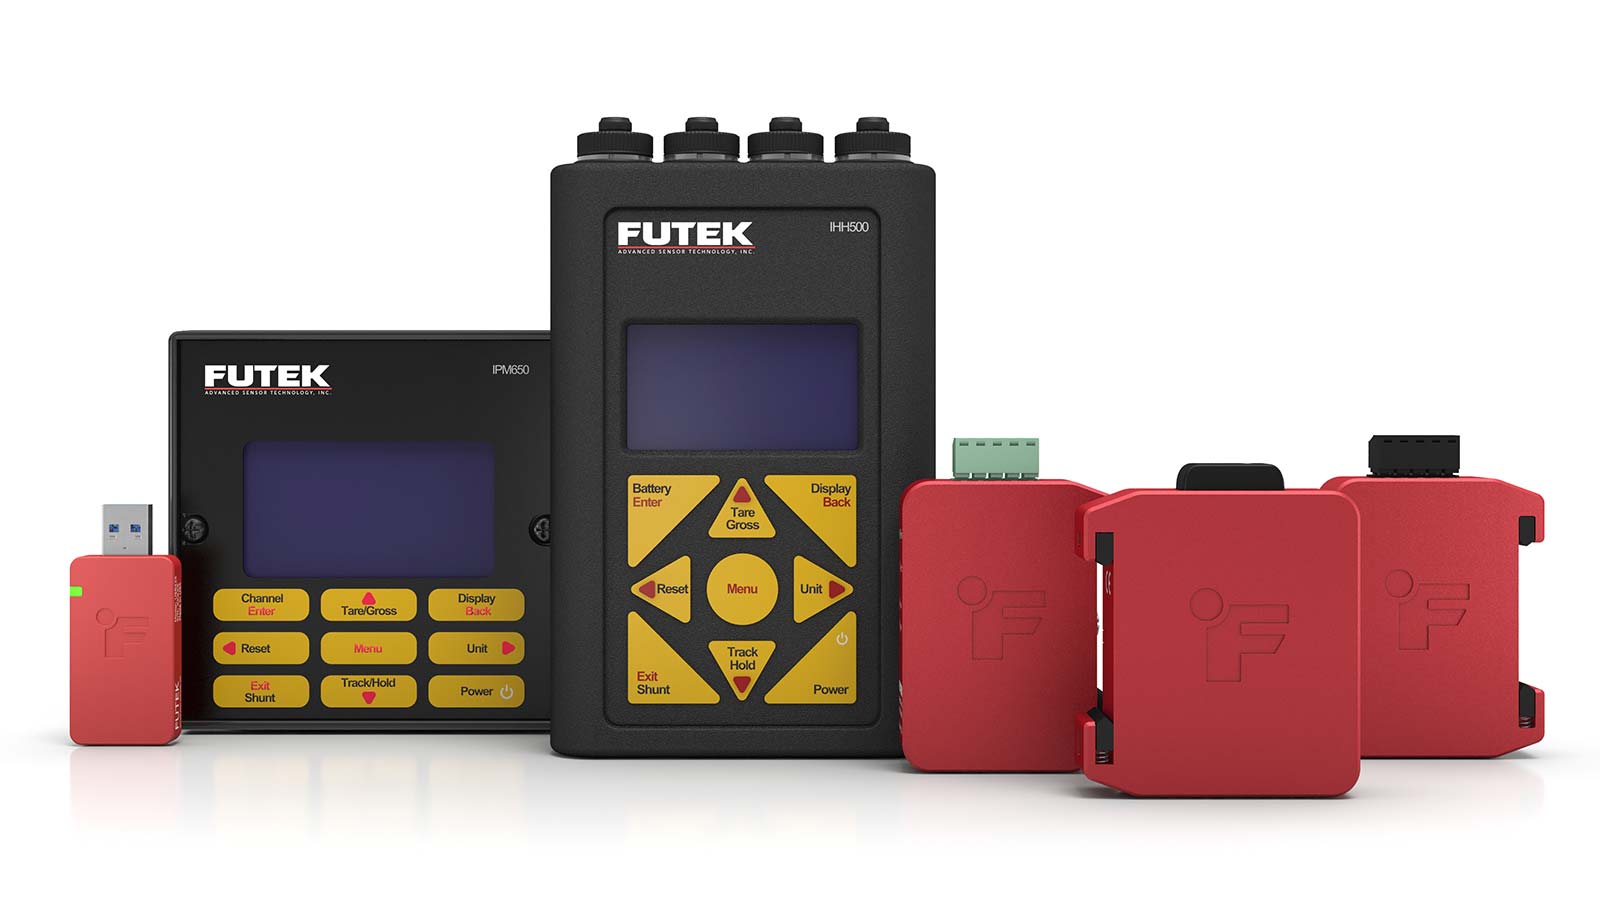
Precision recalibration for FUTEK electronics
FUTEK offers precision recalibration for its line of electronics, including in-line amplifiers (IAAs), handheld displays (IHHs), USB , digital output (QIA), and others. These devices are critical components of your measurement system—and over time, span (gain), zero offset, excitation output, and scaling accuracy can drift from specification. Our process validates signal output, ensures continued accuracy, and supports compliance with industry quality standards. We recommend recalibrating instruments alongside sensors for plug-and-play accuracy and traceability.
Our Wide Range of Calibrations
FUTEK offers calibration options tailored to your application’s specific mechanical and environmental requirements. Whether your sensor operates in a single axis or multiple directions, we ensure it’s tested under the right conditions.

Sensors will be calibrated in tension.

Sensors will be calibrated in clockwise direction.

Sensors will be calibrated in compression.

Sensors will be calibrated in counter-clockwise direction.

Sensors will be calibrated in both tension and compression.

Sensors will be calibrated in both clockwise and counter-clockwise direction.

Sensors can be calibrated at Relative/Absolute pressure.

Sensors can be calibrated at Vaccum pressure.
Need to Calibrate a Non-FUTEK Sensor? We’ve Got You Covered.
Extending calibration beyond our own product line
We calibrate a wide range of third-party strain gauge–based sensors and instruments—including load cells, torque sensors, multi-axis sensors, and signal conditioners—depending on model and fixture availability.
Over the years, we’ve invested significant time and resources into understanding and tooling for select non-FUTEK models. This includes sensors and electronics from Interface, Omega, Transducer Techniques, Honeywell/Sensotec, HBM, and others. We regularly calibrate instruments with mV, VDC, or mA input/output, and maintain internal records of supported devices to reduce setup time and improve efficiency.
Our team performs these calibrations using NIST-traceable standards, with options for both sensor-only calibration and complete system calibration when compatible electronics and cables are provided. Turnaround times and scope may vary by configuration, but we’re transparent from the start. For quick reference, check our list of supported sensor models or contact us directly to confirm compatibility.
FUTEK Calibration: Engineered for Accuracy. Trusted for Speed.
FUTEK’s calibration services are built to support engineers and procurement teams working in tightly regulated, performance-critical industries. Whether you’re managing production timelines, preparing for audits, or maintaining sensor traceability, our capabilities are engineered to deliver accuracy, consistency, and speed at scale. From full-system calibration to fast turnaround and transparency, we help you stay compliant without sacrificing operational momentum.
As little as 2-Day Turnaround
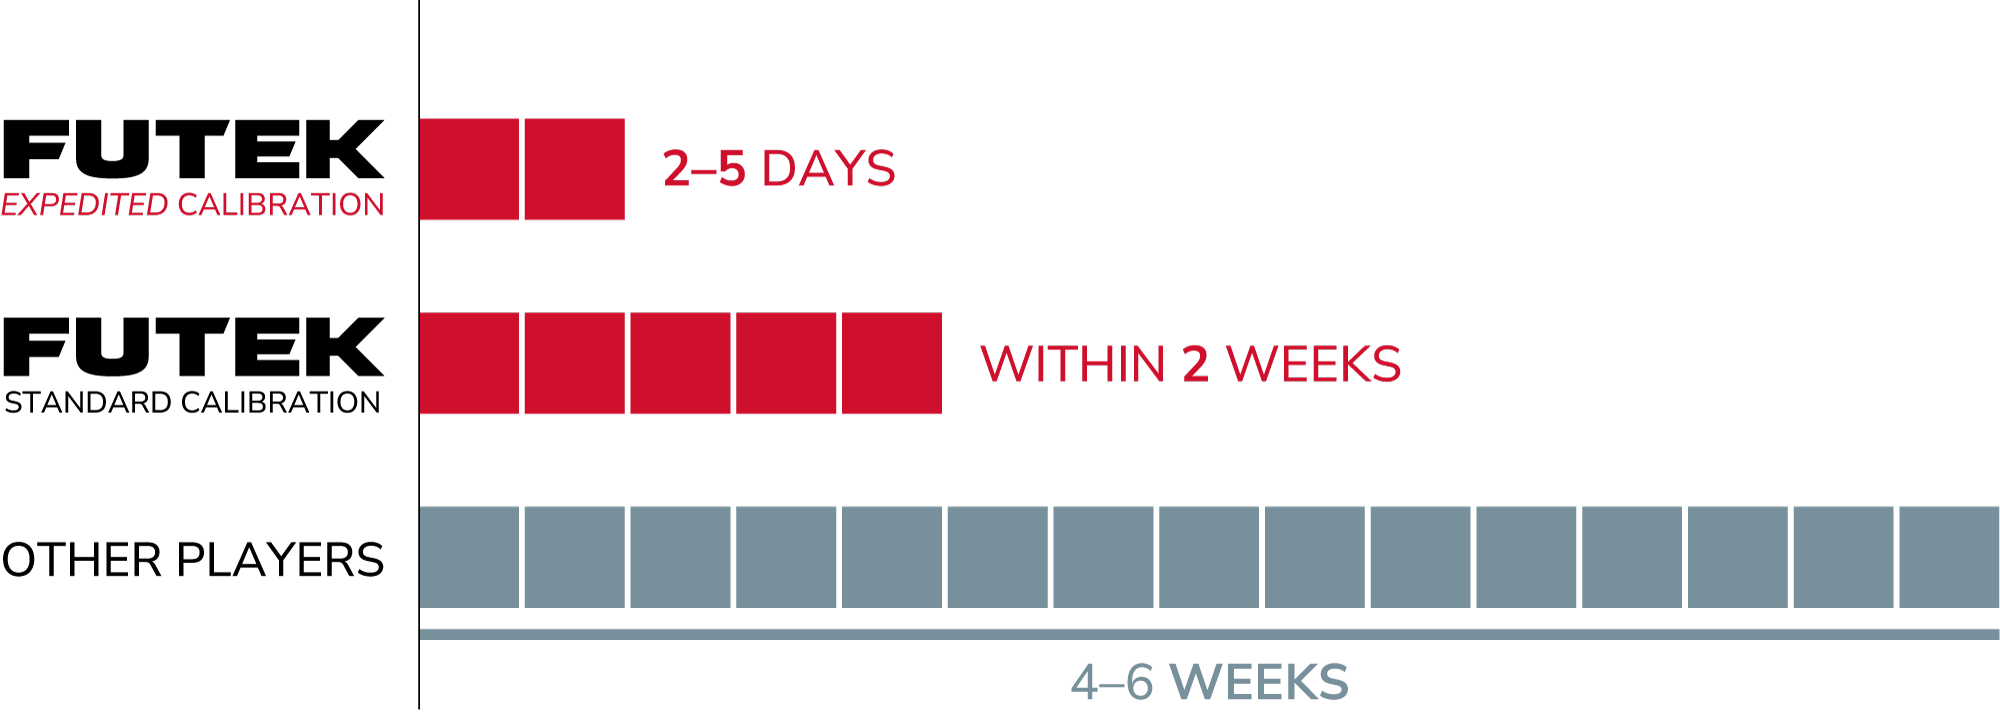
Fastest in the industry — compared to 2-4 weeks norms. We offer expedited calibration in as fast as 2 business days , depending on sensor model and lab availability.
Full-System Calibration with Total System Error
We don’t just calibrate sensors — we deliver a plug-and-play system with known total error across sensor, cable, and instrument.
Support for Non-FUTEK Sensors
We calibrate third-party strain gauge–based sensors and instruments depending on fixture and compatibility. Turnaround times are communicated based on model and capacity.
Accredited & Traceable
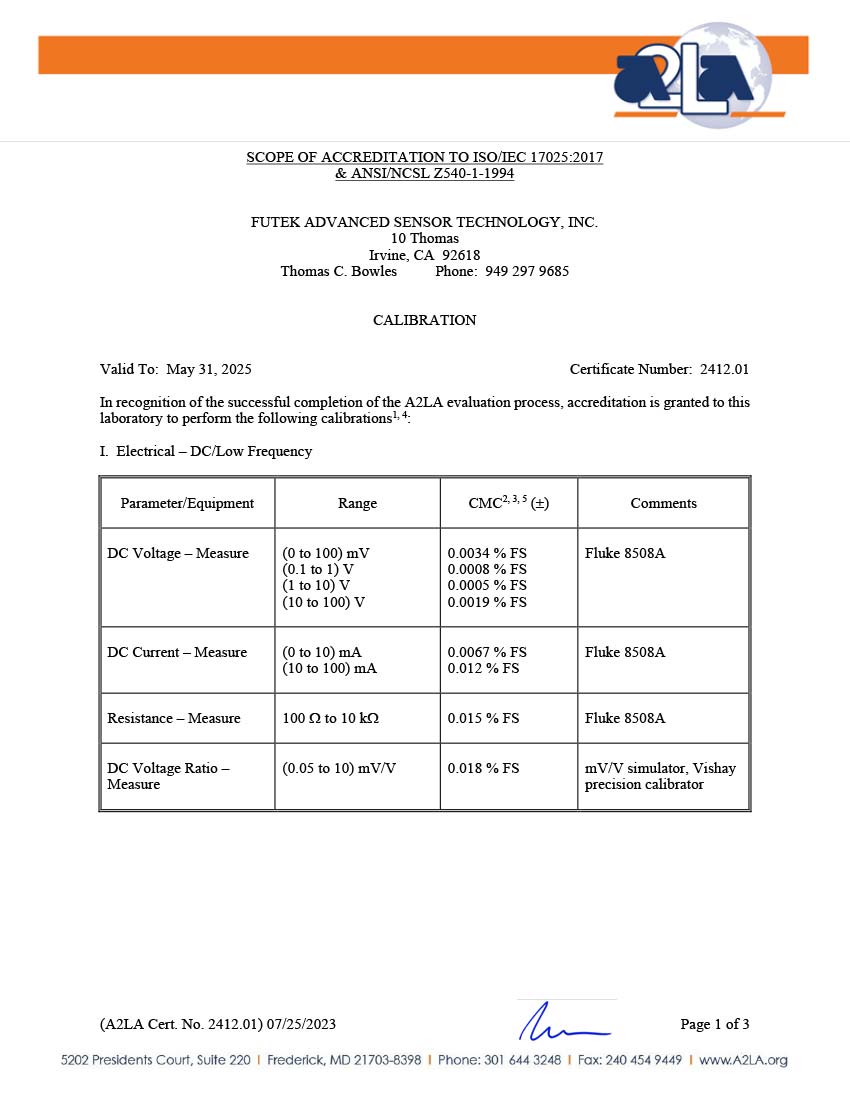
ANSI Z540.3 / ISO 17025 accredited via A2LA and fully NIST-traceable.
Proactive Technical Support
Our Tech Support Team proactively communicates delays, expedites, and setup questions—no black-box experience.
Before/After Calibration Data
Helpful for compliance, troubleshooting, and ROI justification.
Online Calibration History
Track calibration intervals, access past calibration data, and warranties via our integrated calibration portal.
Scalable for Blanket Orders & High-Volume Programs
We support large enterprise clients with PO-free blanket orders and internal budget tracking.
50,000+ Calibrations Performed Annually
In 2024 alone, we completed over 50,000 calibrations and in-process verifications — with capacity to scale up to 70,000 per year.
Every calibration we perform is traceable to NIST standards and conducted using validated procedures aligned with ANSI Z540-1 and ISO 17025 best practices. A2LA-accredited calibration is available as a premium service for applications requiring formal accreditation — such as medical device validation, FDA compliance, or regulated audits. These globally recognized standards help ensure precision, repeatability, and audit-readiness. View all FUTEK certifications.
Contact us to calibrate your sensor
Fast, Flexible, and Always On Your Timeline
Get calibrated and back to work — without delays.
When time is tight, FUTEK delivers. While many calibration labs quote 4-6 weeks, our standard turnaround is just within 2 weeks, with expedited calibration available in as little as 2 business days, based on sensor model and lab availability. But we don’t just move fast — we communicate fast. Our calibration team is known for same-day callbacks, clear status updates, and handling rush requests without red tape.
Contact us to calibrate your sensor
Calibration Options: What’s Right for You?
Not all calibrations are created equal — here’s how to choose the right one.
Customers often ask: “What is and why do I need system calibration?” or “What’s the difference between NIST and A2LA?” These are fair questions — especially when you’re investing in critical hardware for testing, production, or compliance. At FUTEK, we offer several calibration paths to meet your technical, budgetary, and audit-readiness needs. Below, we break down the most common calibration options to help you make an informed choice.
| Feature | Sensor-Only | System Calibration |
|---|---|---|
| Plug-and-Play Ready | ❌ Manual wriring and scaling required | ✅ Fully configured for your system — just connect and go |
| Total System Error | ❌ Sensor error only | ✅ Includes cable loss, amplifier gain, and full signal path |
| Cable / Instrument Included | ❌ Sensor alone is calibrated | ✅ Calibration includes the exact cable, connectors and eletronics |
Want to see the difference between sensor-only and full system calibration in practice? Watch our short video to learn how system calibration eliminates hidden sources of error — like connector mismatch, signal drop, or amplifier scaling—so your setup works right out of the box.
NIST vs. A2LA Calibration
Both NIST-traceable and A2LA-accredited calibrations provide legitimate traceability, but they serve different purposes. If you’re preparing for ISO, FDA, or aerospace audits, an A2LA certificate is often required. If you’re focused on internal quality checks or general testing, NIST calibration is typically sufficient.
| Feature | NIST | A2LA (with NIST) |
|---|---|---|
| Traceability | ✅ Yes, traceable to NIST standards | ✅ Yes, plus third-party accreditation (A2LA) |
| Audit Use | Optional | Required for ISO 9001, FDA, and aerospace audits |
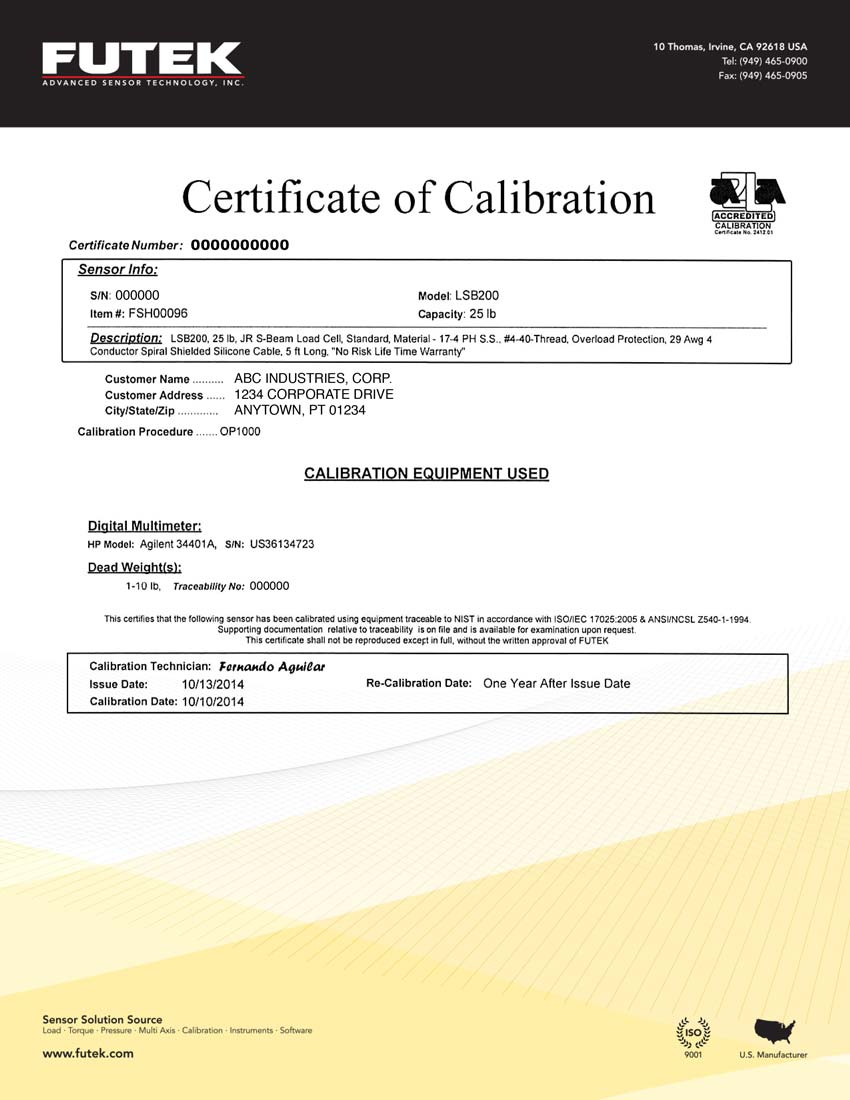
| Certificate Type | Standard | Accredited with A2LA logo and cert number |
| When to Use | Internal validation or R&D | Regulated industries: MedTech, Aerospace, OEMs |
Certificate Types & Documentation
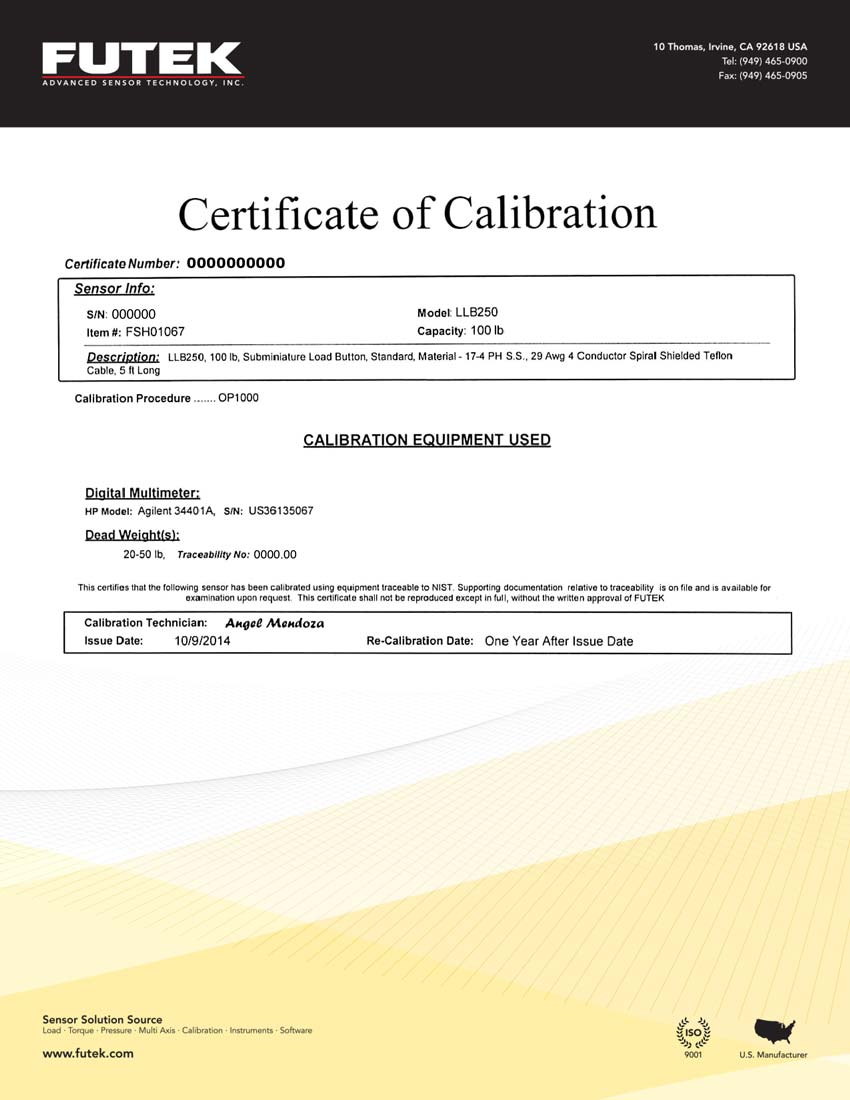
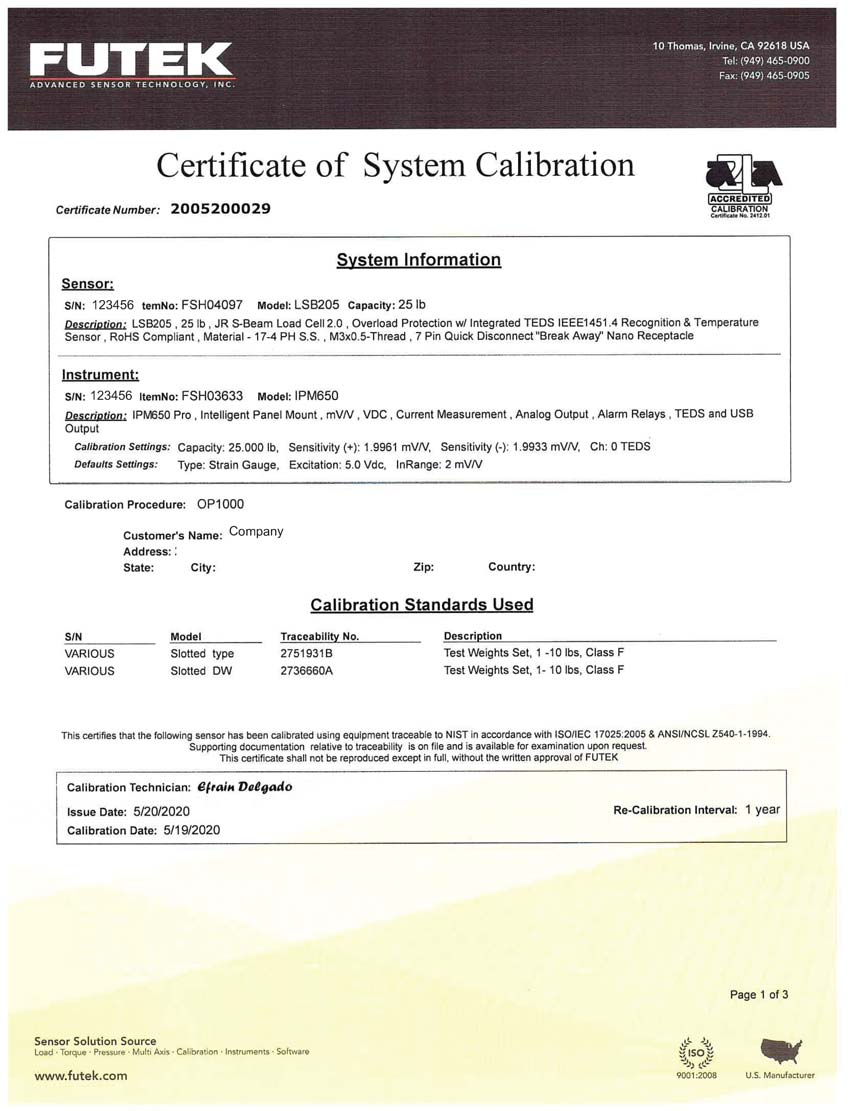
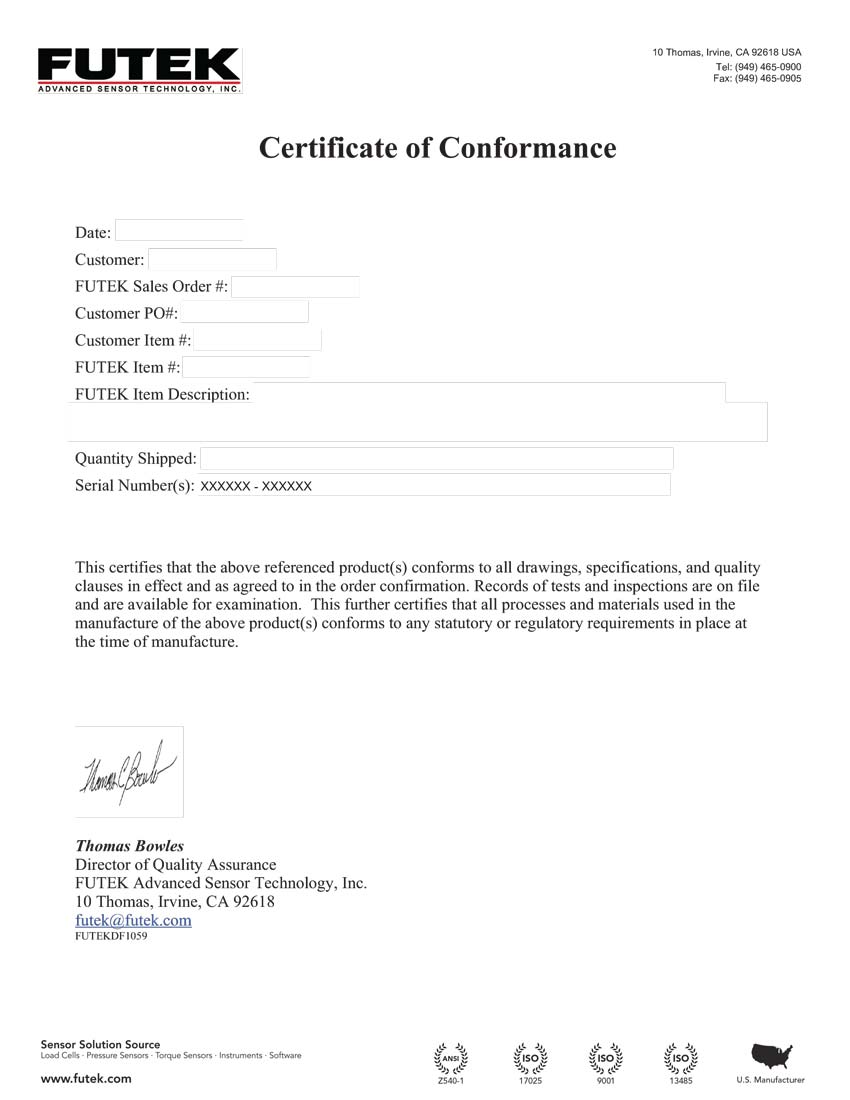
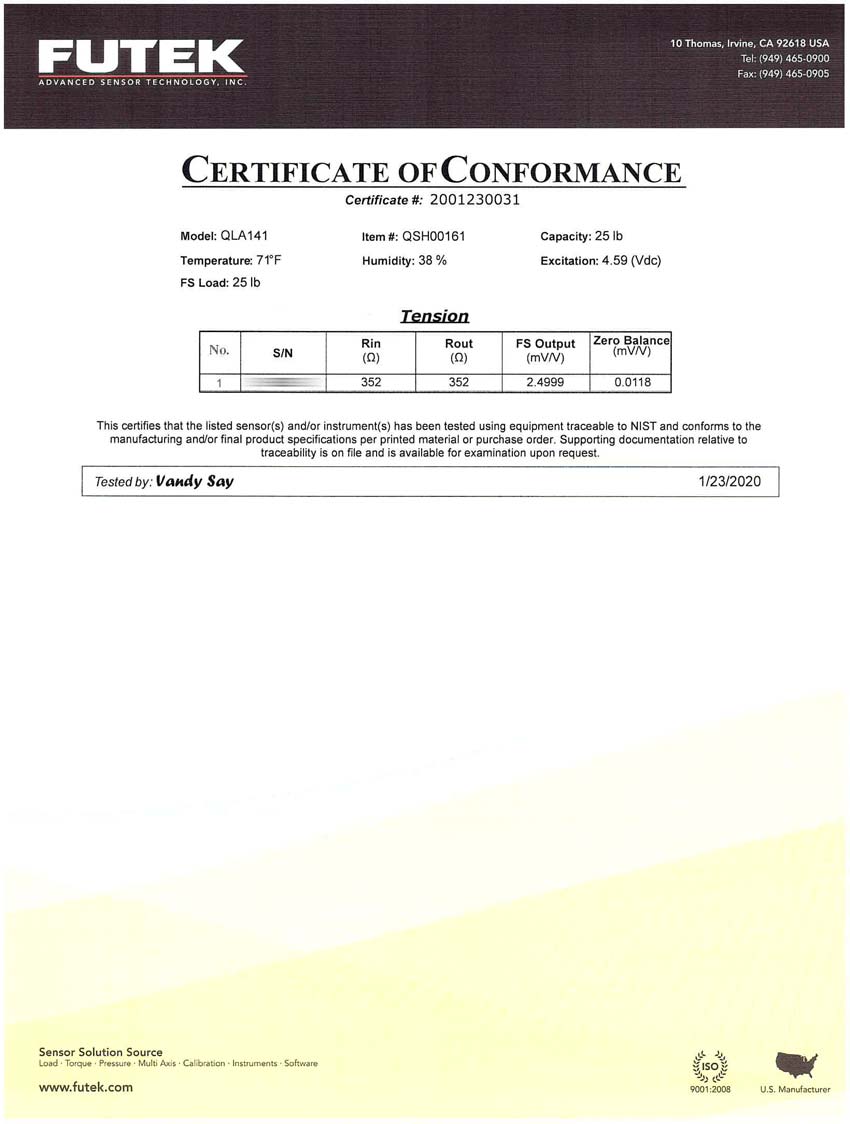
Understanding what’s in your calibration certificate is key to audit readiness, quality control, and technical traceability. Whether you’re validating a system for FDA compliance or just confirming a sensor meets specs, FUTEK provides a range of documentation — from NIST-traceable 5-point records to A2LA-accredited certificates with full uncertainty analysis. This section gives you a visual overview and plain-language explanation of each certificate type we offer, so you know exactly what you’re getting — and what it means.
Contact us to calibrate your sensor
Need Calibration History or Warranty Status?
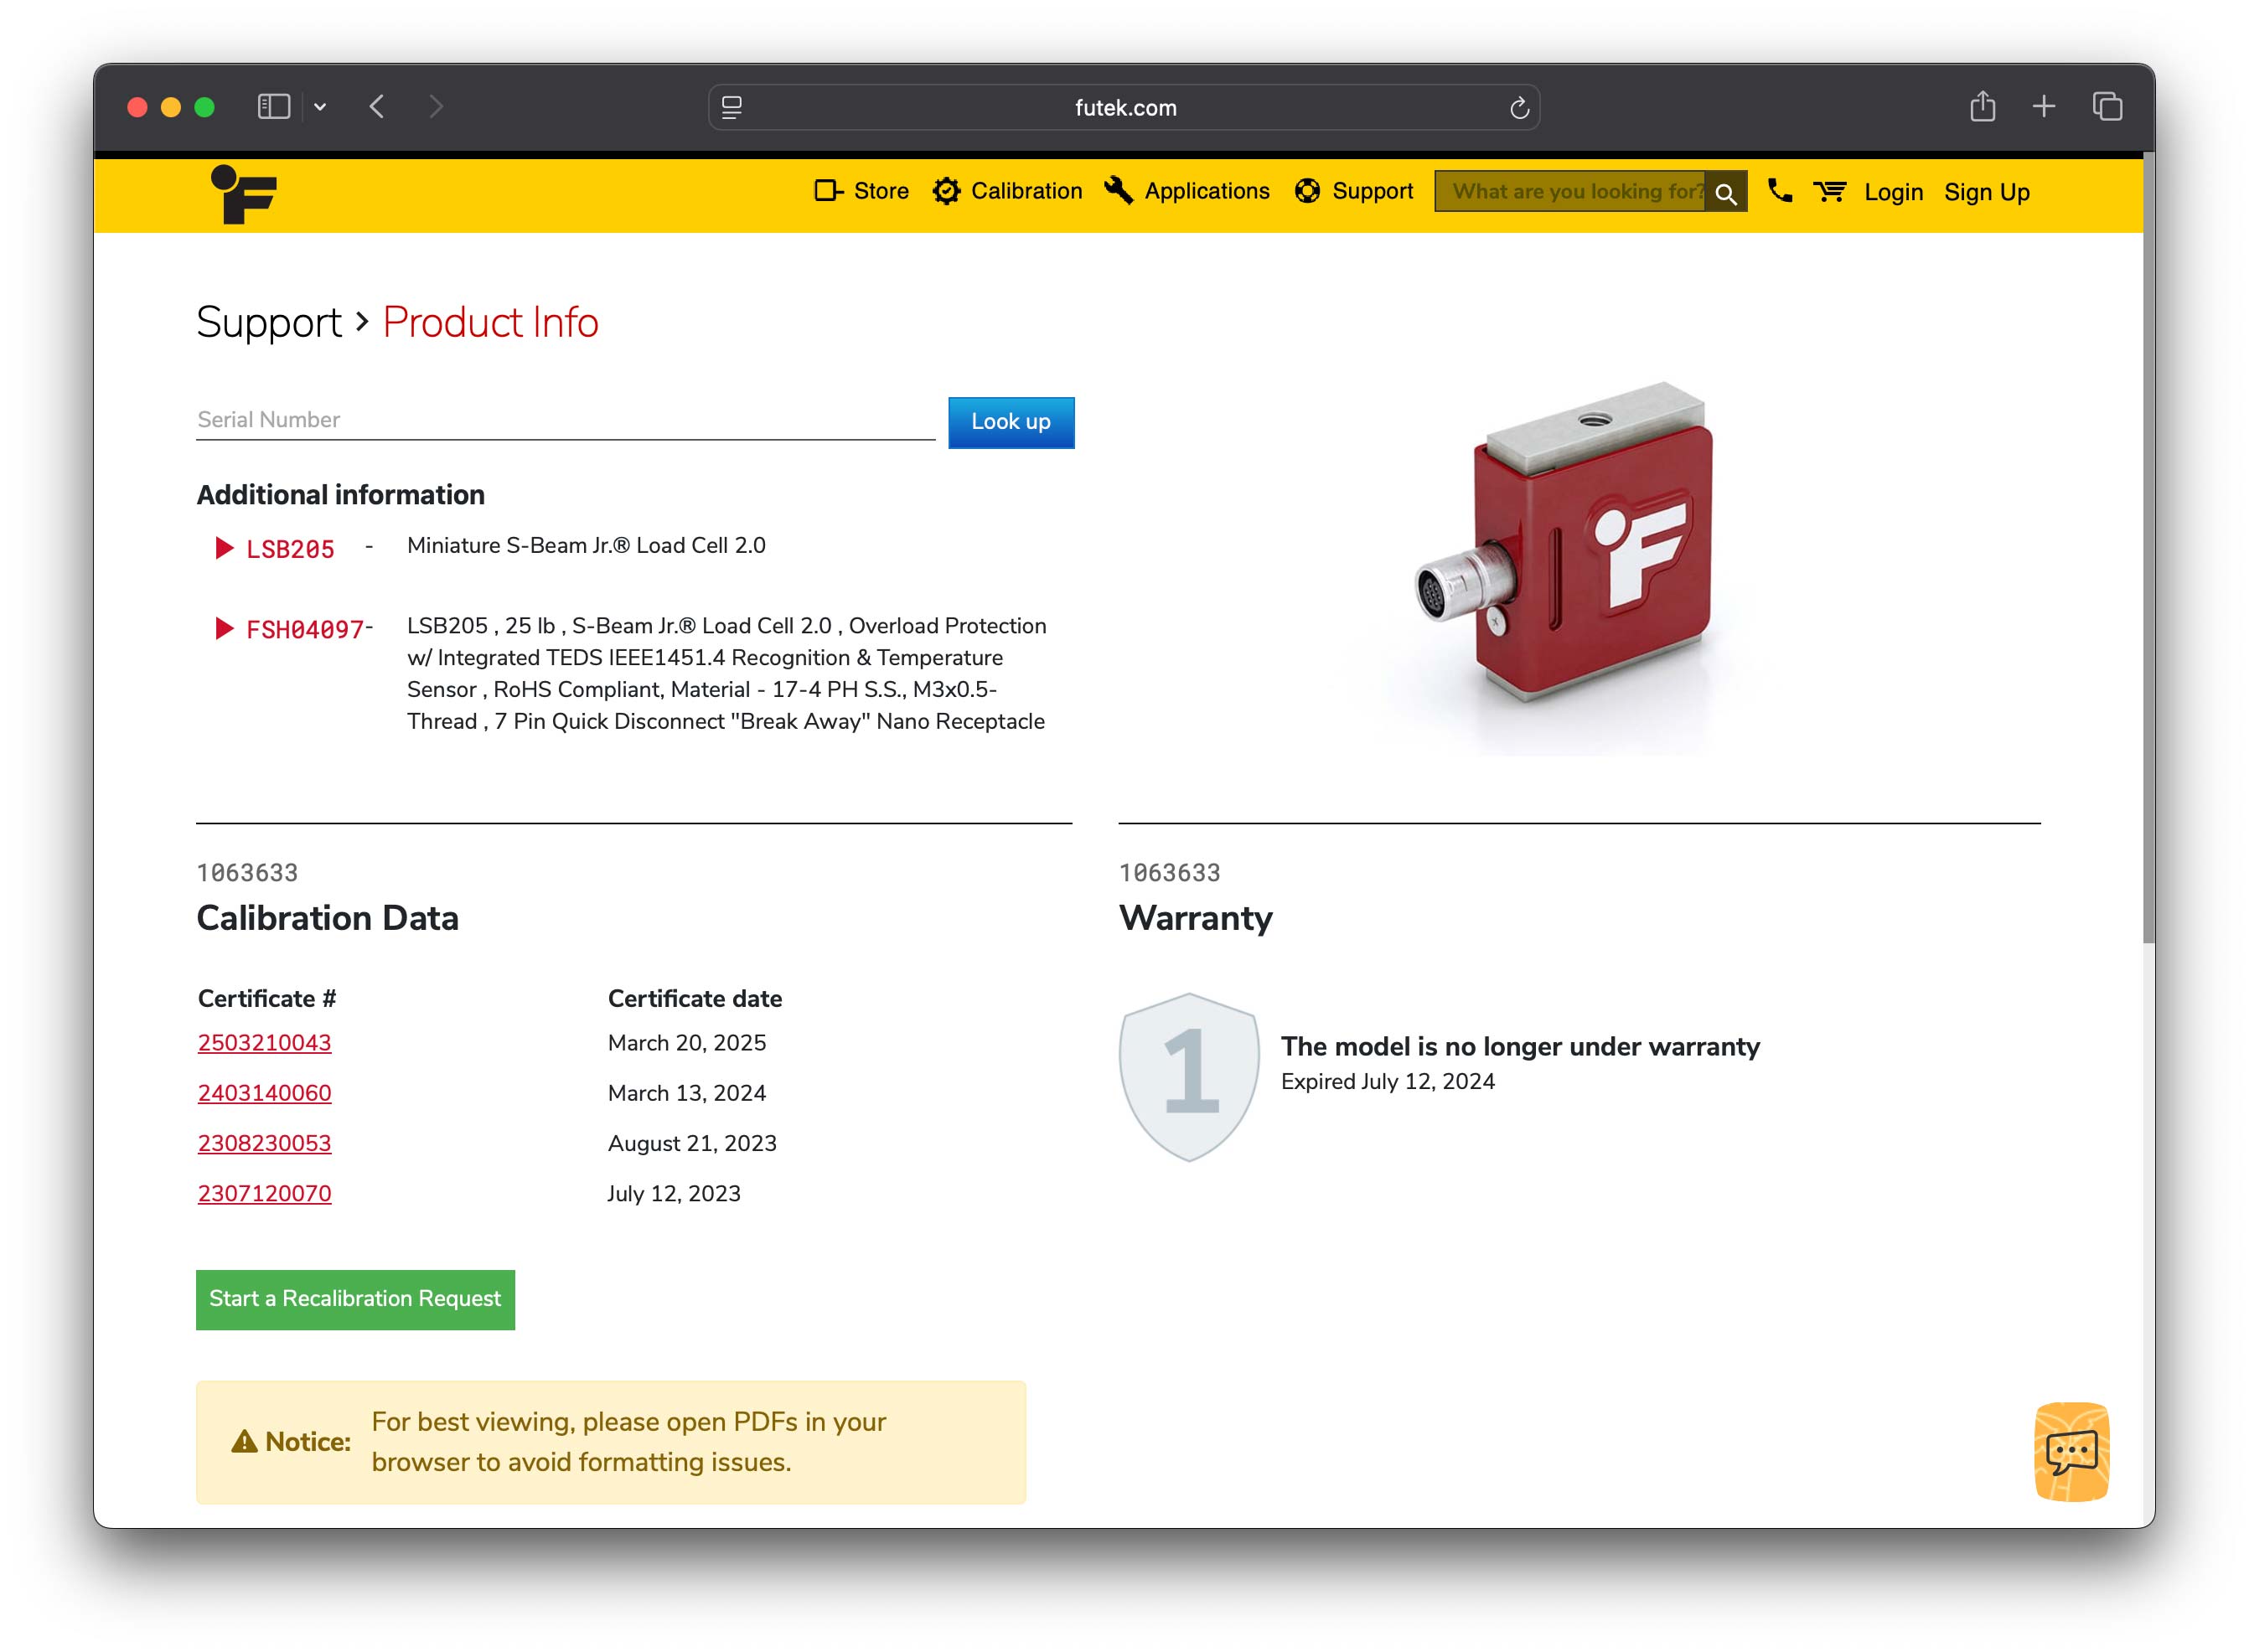
Use Our “Get Help With My Product” Tool
Our all-in-one support utility lets you instantly pull up calibration records, warranty status, and technical details for your specific sensor — just by entering the serial number. Whether you’re prepping for an audit, checking if a sensor is still under warranty, or looking to initiate a recalibration, this tool makes it fast and easy.
- 📄 View Historical Calibration Certificates
- ⏳ Check Warranty Expiration Dates
- 📘 Access Product Drawings, Manuals & Specs
- 🔁 Start a Recalibration Request
Frequently Asked Questions (FAQ):
Have questions about calibration? You’re not alone. From choosing between NIST and A2LA calibration to understanding calibration intervals, certificates, turnaround times, and system setups, our team receives hundreds of questions every year. This section compiles the most common — and most critical — inquiries we hear from engineers, technicians, buyers, and quality managers. Whether you’re prepping for an audit, managing a large fleet of sensors, or simply trying to understand your certificate, you’ll find clear answers here — backed by our technical support team.
Calibration Services & Process
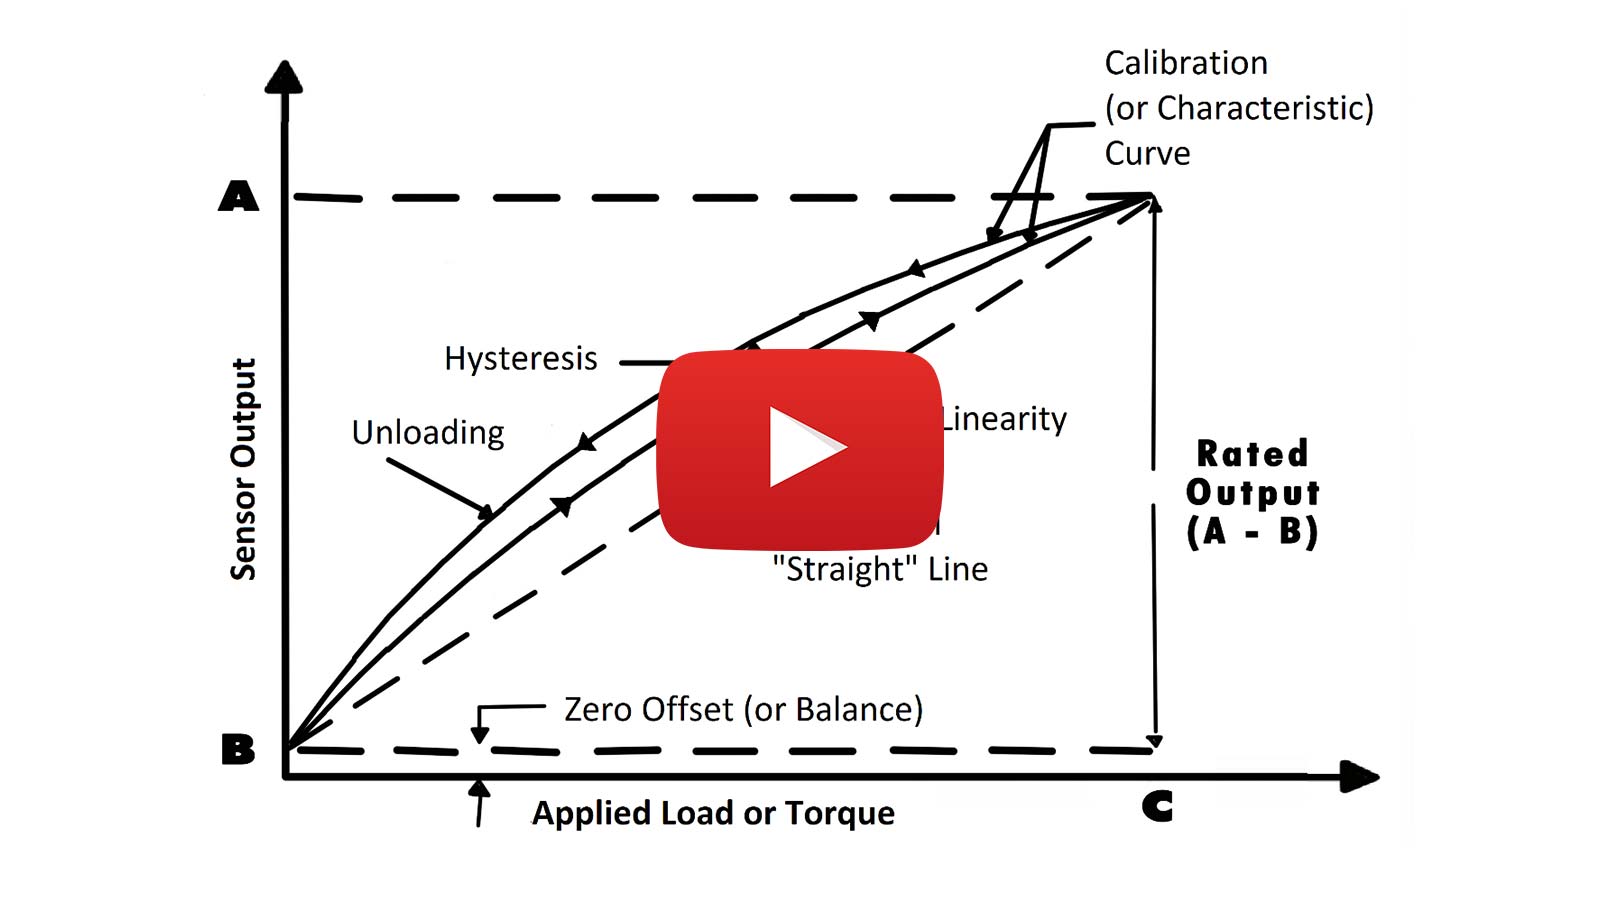
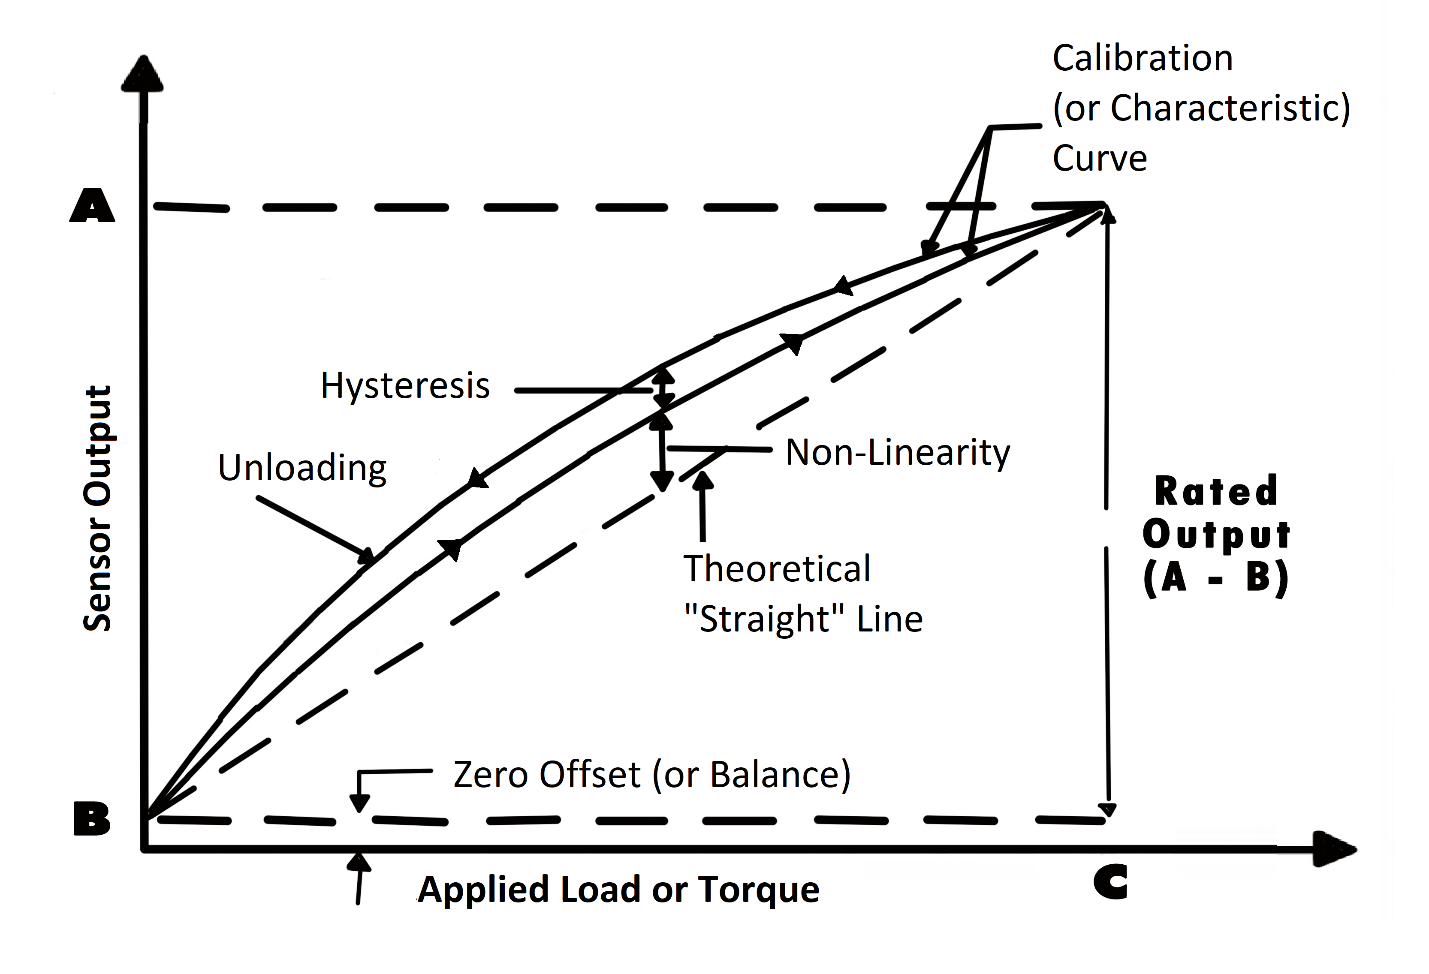
Calibration ensures that a sensor — whether a load cell, torque sensor, or signal conditioner — operates as accurately and reliably as possible. Over time, all sensors are subject to measurement errors, which are the deviations between the actual applied load and the sensor’s electrical output. These deviations are used to generate a calibration curve (also called a characteristic curve) that defines the sensor’s behavior under load.
Without regular calibration, those errors may grow, resulting in inaccurate measurements, quality control failures, or compliance issues. Key sources of error include:
-
Zero Offset (or Zero Balance): A non-zero output when no load is applied. This offset can shift over time due to environmental factors or handling and may indicate zero instability.
-
Linearity (or Non-Linearity): The deviation of the sensor’s actual output curve from a perfectly straight (theoretical) line. Even in well-designed sensors, sensitivity may change across the measurement range, requiring correction through multi-point calibration.
-
Hysteresis: The difference in sensor output when a load is applied vs. removed. Typically measured at 50% of full scale, hysteresis reflects how consistently the sensor responds under loading and unloading.
-
Repeatability (or Non-Repeatability): The sensor’s ability to produce consistent readings under identical loading conditions. Poor repeatability suggests instability or degradation in sensor performance.
-
Temperature Effects: Changes in temperature can shift both the span and the zero point of the sensor. Calibration can help quantify or correct for these thermal effects.
During calibration, we test these parameters using high-precision equipment and certified reference weights. When requested, we also provide advanced measurements such as uncertainty, third-degree polynomial fits, or as found/as left data to meet ISO, FDA, and aerospace validation requirements.
The result? A validated calibration curve — and the confidence that your measurement system is performing to spec.
FUTEK offers several calibration methods based on your application’s accuracy requirements and the sensor’s performance profile:
One-Point Calibration
This is the simplest and fastest calibration method. It adjusts for zero offset only, making it ideal for applications that require accurate readings at a single load point. One-point calibration is suitable when the sensor’s linearity is already well-characterized and stable over time. It’s also helpful for verifying output drift in older or reused sensors.
Two-Point Calibration
Two-point calibration introduces a second reference load (typically full scale) and corrects both zero offset and span (sensitivity). This method generates a straight-line output curve across the measurement range. Because many sensors exhibit linear behavior between 0% and 100% of capacity, this approach is often sufficient for general-purpose applications. It defines the linear equation:
Vout = Sensitivity × Load + Zero Offset
Five-Point Calibration (Multi-Point Curve Fitting)
For critical applications that demand high precision across a defined range, five-point calibration is preferred. This method:
- Samples output at 0%, 20%, 40%, 60%, 80%, and 100% of full scale (and again in reverse order)
- Accounts for linearity deviations, hysteresis, and repeatability
- Enables polynomial curve fitting for advanced system integration and error compensation
| % of full scale | Applied Load (lbs.) | Amplifier Output (mA) |
|---|---|---|
| 0% — No Load | No Load | 4 mA |
| 20% | 10 lbs | 7.2 mA |
| 40% | 20 lbs | 10.4 mA |
| 60% | 30 lbs | 13.6 mA |
| 80% | 40 lbs | 16.8 mA |
| 100% — Full Scale | 50 lbs | 20 mA |
| 80% | 40 lbs | 16.8 mA |
| 60% | 30 lbs | 13.6 mA |
| 40% | 20 lbs | 10.4 mA |
| 20% | 10 lbs | 7.2 mA |
| 0% — No Load | No Load | 4 mA |
In most cases, five-point calibration is performed with the sensor and instrument together to represent real-world usage and achieve plug-and-play system calibration. As illustrated in the table, for a 50 lb system using a 4–20 mA amplifier, expected output values span from 4 mA (no load) to 20 mA (full load) in both directions.
It depends on the type of sensor and what is specified on its spec sheet. Please refer to the sensor's spec sheet and look for the standard calibration specified and the loading direction (tension, compression, clockwise, counterclockwise) that is offered with the sensor.
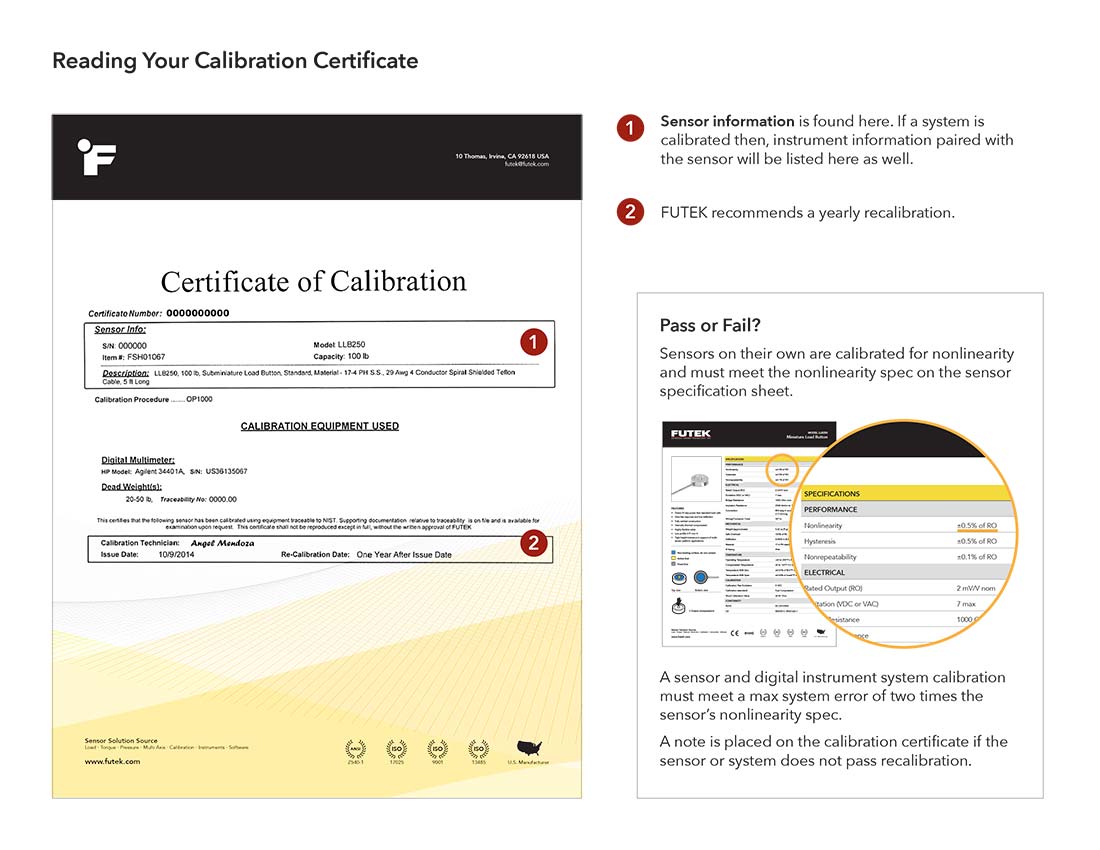
As sensors are exposed to continuous usage, aging, output drift, overload, and improper handling, FUTEK highly recommends a yearly recalibration interval. Frequent sensor recalibration helps confirm whether the sensor maintained its accuracy over time and provides a load cell calibration certificate to show that the sensor still meets specifications and prepping the measurement systems for audits.
However, when the sensor is used in critical applications and harsh environments, load cells may require more frequent calibrations. Please consult with our Recalibration Team, who will help you evaluate the most economical calibration service interval for your sensor.
A measurement system usually encompasses the sensor, instrument or signal conditioner, cabling, and connectors. A full system calibration ensures that the whole system is performing accurately as expected. Many of the system calibrations are done live and will need high-precision loads applied. Additionally, the system calibration also takes care of any connectors that may need to be soldered. Choosing a complete system calibration allows you to start using your measurement solution out of the box. A system calibration creates a plug & play solution where all connectors, cables, and instrument settings are taken care of.
Check out below a video on the “Benefits of System Calibration”:
A sensor calibration must meet the sensor’s non-linearity spec, which is found on the sensor’s spec sheet. A system calibration, which is the calibration of a sensor and a digital instrument, must meet the sensor’s non-linearity times two and is listed on a certificate as system tolerance. A note is added when a sensor, or system, does not meet the specifications.
This document explains every section of the calibration certificate and how to interpret it.
Yes, but dual-direction calibration must be done during the same session to be valid. Be sure to request this service up front.
Dual direction calibration must be performed at the same time and under the same environmental conditions and calibration setup to be effective. A dual-direction calibration service must be ordered to get valid dual-direction calibration information.
Well, we can! On-site calibration is available for select sensors and customer locations. Contact our team for details and availability.
Calibration Results & Technical Variables
R.O. stands for rated output and will be the sensor's capacity, the last calibrated applied load, or the electrical equivalent of those points.
NL, or non-linearity, is the maximum deviation of the observed output of the sensor calibration curve from a theoretical straight line, ranging from zero to the last calibrated loading point. The difference between these two points is displayed as a percentage of the final calibrated loaded amount or rated output.
The zero reading is to eliminate any zero offset (or load cell zero balance) and allow the span from the loading to be presented. The zero is to show that the sensor was "tared out", or that any natural zero offsets and any effect of fixtures were removed before applying loads.
Shunt is a positive change in output that is generated from an unloaded sensor when resistance is placed between the –signal and –excitation connections of the sensor. Shunt information can be used to check the health of the sensor over time and assist with setting up devices, such as DAQ systems, by providing a known output without a physical load needed.
Electrical shunt output is presented into an equivalent load amount using the slope of all directions calibrated. This supplies confirmation of what the shunt change will be if using either direction of the listed calibration information.
A2LA information is presented in a polynomial equation with applied load indicated with x and output indicated by y. The output is found by solving for y where the applied load is placed in the equation for x. The applied load is found by solving for x where the observed output is placed in the equation for y.
"As Found" information on a calibration certificate is the observed performance of the sensor, or system, as it was first received at our load cell calibration lab. "As left" information is the result after any noted adjustments that are made to help bring the sensor, or system, into the specification. "As found = as left" means that the "as found" information meets specification and no adjustments were needed to the sensor or system.
An "as found" and "as left", if necessary, are performed under the same load cell calibration service and do not incur and additional charge.
Certificates, Traceability & Compliance
Calibration summary information may be available online using the sensor’s serial number. Please retrieve a summary of your sensor calibration data in our ““Get Help With My Product” Tool” Tool here.
We offer:
- NIST 5-point sensor certificates
- A2LA-accredited force and system calibration certificates
- Certificate of Conformance
- System calibration reports with total system error
- Instrument-only calibration reports
Each is clearly labeled and formatted to meet industry and audit standards.
NIST-traceable calibration confirms that your sensor was tested using equipment traceable to national standards. It’s widely accepted and sufficient for general use.
A2LA calibration goes a step further — it’s both NIST-traceable and formally accredited to ISO 17025 and ANSI Z540.3. This includes detailed uncertainty analysis, a third-degree polynomial equation for system calibration, and audit-ready documentation. A2LA is recommended when compliance with strict regulatory or quality standards is required.
A Certificate of Conformance (CoC) is a document that certifies the product — whether a sensor, cable, or instrument — was manufactured in accordance with its engineering drawings and has passed all required inspections during the production process. It confirms that the item meets internal quality standards and customer specifications outlined in the purchase order.
However, it’s important to note that a CoC does not contain any measurement or calibration data. It does not verify sensor performance or accuracy — only that the product was built and inspected according to design requirements. For verification of output characteristics and traceable data, a separate Calibration Certificate is required.
Turnaround & Expedited Service
Standard turnaround is less than 2 weeks after we receive the unit. If the sensor has any functionality issues, additional time may be required and will be communicated by our team. If you need expedited calibration (as fast as 2 business days), please contact us to check availability.
Yes. We offer up to 2-day expedited calibration service, depending on lab available capacity, sensor type, and calibration requirements.
This turnaround is most feasible for standard load cells and basic configurations. More complex cases, like third-party sensors, system calibrations, or sensors requiring special fixtures, may require longer lead times.
Please contact our calibration team in advance to confirm availability for your specific model.
We’ll contact you promptly with findings and next steps. If calibration can’t proceed due to a fault, our tech support team will coordinate a solution.
Many labs quote 4-6 weeks. FUTEK’s default less than 2 weeks service — with 2-day expedite options — is among the fastest in the industry, with no compromise on quality.
Logistics, Shipping & Order Setup
Please include all cables that came with the sensor. If you are requiring a full system calibration, please include the instrument alongside your sensor. We do ask that you remove all fixtures from the unit prior to shipment.
A checklist of items coming in for recalibration can be found here.
It's a self-service tool where you can enter your sensor's serial number to instantly access calibration records, warranty status, product specs, and manuals. You can also use it to download certificates and even initiate a recalibration request — all in one place. Ideal for audit prep, maintenance planning, and ongoing sensor tracking.
For enterprise clients and high-volume programs, FUTEK offers blanket recalibration agreements to streamline recurring service needs. Instead of issuing a new purchase order for each sensor, customers can operate under a pre-approved blanket PO with flexible billing terms and volume-based scheduling. This eliminates administrative friction, reduces quoting delays, and accelerates turnaround.
Sensors can be sent in batches or on a rolling basis, with internal tracking tied to each serial number. Our system flags recalibration eligibility, links to prior certificates, and ensures compliance with customer-specific intervals. Blanket agreements are especially useful for QA teams managing hundreds of sensors across facilities or those preparing for periodic audits.
To set up a blanket order program, contact our Recalibration Team — we’ll guide you through the initial setup and tailor the process to match your internal workflows.
Ready to Calibrate with Confidence?
Whether you need a 2-day rush turnaround or A2LA-accredited ceertificates, FUTEK’s lab is engineer to deliver speed, precision, and peace of mind without sacrificing precision.
From non-FUTEK sensors to plug-and-play system calibration — everything we do is built to remove friction and raise your confidence.
You’ve seen the proof. Now let’s put it to work.

